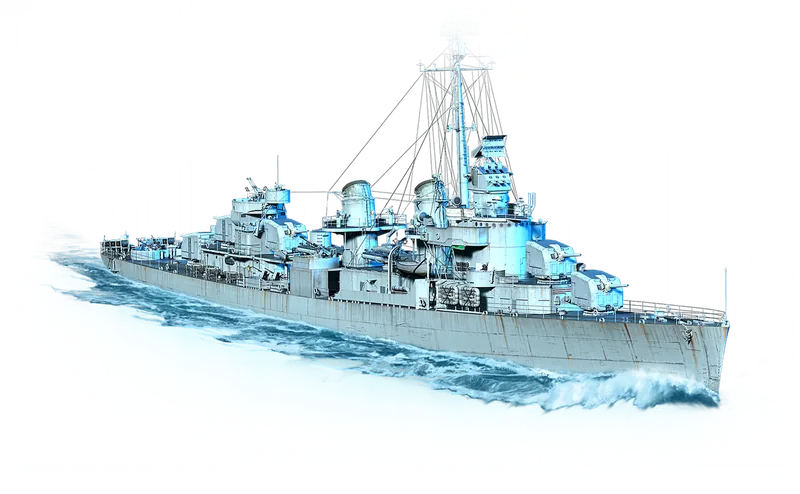
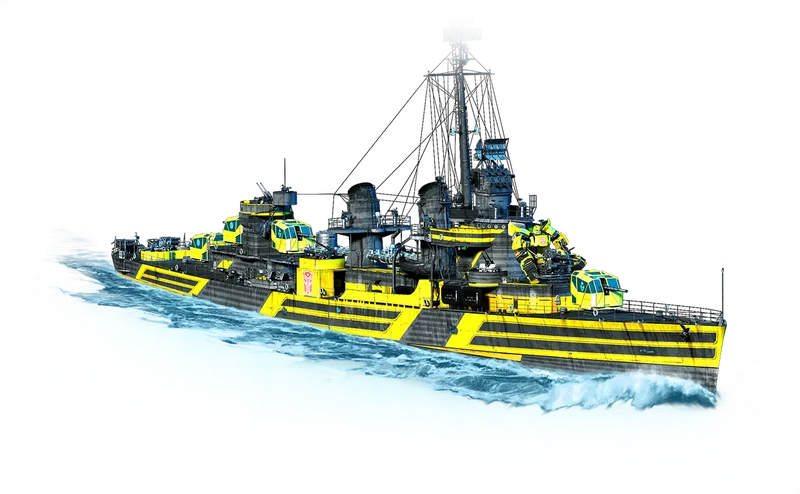
Hit PointsInitial: 14,400 → 16,700
Displacement2,924 t
Hull dimensions ƒ
Length x beam at the waterline, with the hull's draft where the client carries one. Ships whose client entry holds only the 260 x 20 m placeholder use a curated real-world figure instead, and any ship we have no trustworthy size for omits this row rather than print the placeholder. Length matters when dodging torpedoes; beam and draft shape how hard the ship is to hit.
Armor range13–20 mm
Plate armor thicknesses13, 19, 20 mm
Armor material/layer entries28
Fire resistance ƒ
Does not reduce the damage a burning fire does per second: replay-measured burn ticks run at the full rate on every ship. By elimination it lowers how often hits set you on fire; ignition-rate replay data is consistent with that but too confounded by attacker mix to measure the reduction directly.
Fire duration30 s
Fire damage ƒ
Each fire ticks 0.3% of max HP per second for the full 30 s, so one unattended fire burns 9% of the pool (1,503 HP on this ship). 4 fire points can burn at once. Verified against measured burn ticks in replay data.
Flood duration40 s
Flood damage ƒ
A flood ticks 0.25% of max HP per second for the 40 s duration, so one unattended flood costs 10% of the pool (1,670 HP on this ship). Verified against measured flood ticks in replay data.
Torp Reduction ƒ
Reduces torpedo hit damage. Replay data shows no effect on floods: flood ticks run at the full rate and flood frequency does not decline with protection.
Magazine HP ƒ
Per-turret powder-magazine HP, a separate pool from the ship's. Penetrating hits wear it down and the turret is likelier to be knocked out as it falls, so a larger pool keeps the guns firing through punishment that silences a peer's.
Steering gear HP ƒ
Durability of the steering gears. As this pool drops, hits are likelier to jam the rudder; unlike most modules the steering can be knocked out and repaired but is never permanently destroyed.
Repairable: penetration50%
Repairable: steering gear50%
These main guns are dual-purpose: they also fire at aircraft and feed the AA Defense card.
ModuleArtillery: 5×127 mm
Mounts / barrels5 mounts / 5 barrels
Reload time3 s
Firing range (base)10 km
Firing range (top fire control)11 km
Turret traverse34 °/s
Turret armor20 mm
Turret traverse arcs ƒ
How far each mount can train, in degrees to either side of the mount's own facing, read from in-game data. A rear turret with ±150° leaves a 60° blind wedge over the bow; one-sided arcs are wing mounts that cover a single side. The data does not say which way each mount faces, so the arcs are listed per mount without bow/stern angles.
Guns to bear ƒ
How far off the bow (or stern) the ship must angle before every main turret can fire: the widest blind wedge among the rear-facing (or forward-facing) mounts, from each mount's trainable arc. Mount facing is inferred from turret stations and verified against known layouts, including Izumo's aft-facing forward turret.
HE fire DPM vs T7 BB37089
Effective HE DPM vs T7 BB217089
Shell Grouping (σ)2
Max Horiz Disp ƒ
Horizontal dispersion ellipse width at max range, from the verified WoWS dispersion model:
Max Vert Disp ƒ
Vertical dispersion ellipse height at max range:
Med Horiz Disp ƒ
50%-hit horizontal radius:
Med Vert Disp ƒ
50%-hit vertical radius:
Turret turn time ƒ
180 degrees / 34 deg/s traverse speed = 5.3 s.
Shells/min ƒ
Zero upgrades: 5 broadside guns x 60 / 3 s base reload = 100. All upgrades (Main Battery Mod. 3 = -10% reload): 5 broadside guns x 60 / 2.7 s all-upgrades reload = 111.1.
HE shells
HE Damage patched
- baseline1800
In-game data
- 2021-05-131900
HE Velocity792 m/s → 830 m/s
Fire Chance5%
HE penetration ƒ
21 mm ≈ 127 mm caliber / 6 (standard HE penetration ratio).
HE full-salvo alpha ƒ
1,900 HE damage x 5 broadside guns = 9,500.
HE DPM ƒ
Zero upgrades: 9,500 HE full-salvo alpha x 60 / 3 s base reload = 190,000. All upgrades (Main Battery Mod. 3 = -10% reload): 9,500 HE full-salvo alpha x 60 / 2.7 s all-upgrades reload = 211,111.
Fires/min ƒ
Zero upgrades: 100 shells/min x 5% fire chance = 5. All upgrades (Main Battery Mod. 3 = -10% reload): 111.1 shells/min x 5% fire chance = 5.56.
AP shells
AP Damage patched
- baseline2100
In-game data
- 2021-05-132200
AP Velocity792 m/s → 830 m/s
Min Ricochet45 deg
Guaranteed Ricochet60 deg
Fuse Timer0.01 s
Fuse Threshold21 mm
AP overmatch ƒ
floor(127 mm caliber / 14.3) = 8 mm (AP auto-penetrates plating this thick or less).
AP Pen Close ƒ
Canonical community AP formula (jcw780/wows_shell), evaluated at muzzle velocity: . Matches the in-game spec card.
AP Pen Far ƒ
Same formula at the ship's max firing range (11 km), where the shell has slowed to 307 m/s: .
AP full-salvo alpha ƒ
2,200 AP damage x 5 broadside guns = 11,000.
AP DPM ƒ
Zero upgrades: 11,000 AP full-salvo alpha x 60 / 3 s base reload = 220,000. All upgrades (Main Battery Mod. 3 = -10% reload): 11,000 AP full-salvo alpha x 60 / 2.7 s all-upgrades reload = 244,444.
AP AOE Radius ƒ
AP shell over-penetration splash radius; scales with shell mass. Wickes 102mm = 3, standard 152mm CL ~ 20, Iowa 406mm ~ 270, Yamato 460mm = 400, Incomparable 650mm = 550 (max). Larger value = bigger splash damage area when AP over-pens.
ModuleTorpedoes: Mk15 mod. 3
Launchers / tubes2 launchers × 5 tubes = 10 tubes
Reload time ƒ
Base reload of the top torpedo module (all-upgrades configuration); the stock module reloads in 105 s. In-game port tooltips additionally fold in your installed modernizations and commander effects - e.g. Torpedo Launchers Mod. 3 alone is x0.85: s.
Projectile speed ƒ
Speed of the top torpedo module (all-upgrades configuration, 62 kt); the stock torpedo module runs 55 kt. Site stats assume the full-upgrades fit unless a row shows a stock → top pair.
Range10.5 km
Maximum simulated damage ƒ
Estimate of WG's in-game value; matches the in-game port screen within ±5%. Saturation: most targets only intersect one hull section, so the sim transfers ~1/3 of the warhead alpha (2/3 when the warhead blast >= 5000 and the burst reaches a second section). For this ship: .
Maximum damage (ammunition) ƒ
The ammunition card's 'Maximum Damage' stat, exact: warhead alpha / 3 plus the blast addend. This is the per-torpedo number most references quote; the 'Maximum simulated damage' row above is WG's separate geometry-sim stat from the launcher spec panel.
Torpedo detectability1.1 km
Reaction time ƒ
How long a target has to dodge after your torpedo is spotted at its detectability range (lower means less warning): . The 2.6855 m/s-per-knot game-speed factor is calibrated from in-game measurement; the community's traditional 2.6 reads about 3% slower. Base value; commander torpedo-concealment skills lower it further. Community torpedo-reaction calculator by u/LorenDovah and u/The_ColorOutofSpace.
Flooding chance ƒ
Read straight from the game's own data: this torpedo carries a flooding-chance value of 2.79 per hit, shown as . Torpedo flood values above 100% are normal: in battle the base chance is scaled down by the target's torpedo protection (the Torp Reduction stat on its Survivability card) and any flood-resistance modifiers, so a value above 100% keeps flooding likely even through partial protection. Not shown on the in-game port screen.
Torpedo launcher traverse25 °/s
Torp Turn ƒ
Time to rotate the launchers 180 deg: .
Torp Arming197 m
Per-side salvo damage ƒ
One side firing, all torpedoes hitting: per-side tubes x per-torpedo simulated damage = 10 x 15,533 = 155,330.
AA mount pointsInitial: 6 → 12
Maximum AA range ƒ
Longest-reaching family on the in-game AA card. Base AirDefense aura max range is 3.5 km; dual-purpose mount auras extend it.
40 mm Bofors Mk1Initial: 2×2 → 5×2 40mm
20 mm Oerlikon Mk4Initial: 4×1 → 7×1 20mm
Gunsmain battery (DP)
Continuous DPS ƒ
Effective DPS in in-game units (raw aura damage × 3.5 × hit probability, summed per contributing aura) - matches the Close-range AA DPS headline's currency. Includes 84 from dual-purpose main battery firing as AA in this range band.
Range5 km
Guns40 mm Bofors Mk1
Continuous DPS ƒ
Effective DPS: 33 raw aura damage × 3.5 × 1 hit probability = 116 - the same in-game units as the Close-range AA DPS headline.
Range3.5 km
Total DPS in Aura ƒ
Far 84 + Medium 116 = 200
Guns20 mm Oerlikon Mk4
Continuous DPS ƒ
Effective DPS: 18 raw aura damage × 3.5 × 0.95 hit probability = 60 - the same in-game units as the Close-range AA DPS headline.
Range2 km
Total DPS in Aura ƒ
Far 84 + Medium 116 + Near 60 = 260
Bursts ƒ
Each ~2 s wave fires 2 quick salvos of 2 clouds ahead of the attacking squadron, plus 1 stray cloud farther out that appear off-beat between waves - up to 5 clouds per wave × 220 damage each. Planes that fly into a cloud take its damage; clouds dissipate before the next wave lands. Defensive AA Fire, where fitted, multiplies the salvo repeats within each wave.
Cloud damage ƒ
Damage a plane takes for flying into one flak cloud, before any reductions.
Cloud spawn chance ƒ
Every potential cloud spawns - the full pattern, every wave. Often called flak 'hit chance', but spawned clouds always damage planes that fly into them - the roll is on spawning.
Wave rate ƒ
A flak wave spawns roughly every 2 s - timed frame-by-frame from gameplay footage and consistent across ships.
Fired by ƒ
Flak keeps firing while at least one main battery mount is operational - even losing every other AA mount does not stop it.
Flak zone ƒ
The activation band: flak fires while attacking planes are inside it. Clouds are placed ahead of the planes' path, so bursts can land short of 2.5 km or past 5 km - once planes get inside the band, new waves stop. AA range bonuses push the outer edge out; the 2.5 km inner edge does not move.

Maneuverability
Engine power60,000 hp
Maximum speed36.5 kt
Turning circle radius560 m
Rudder shift time3 s
Engine power-boost threshold7 kt
Engine spool-up time7.7 s
Reverse spool-up time3.8 s
Reverse speed ƒ
top speed / 4 + 4.9 = 36.5 / 4 + 4.9 = 14 kt. The community reverse-speed model from the WoWs ShipBuilder project, the same source as the acceleration model on this card. Base value; speed modifiers scale it. Not shown on the in-game card.
Crash stop ƒ
Seconds from top speed to a dead stop after ordering full reverse: reverse power winds in over the reverse spool-up while water drag does most of the braking. Same community-model simulation as the acceleration times, using the ship's own reverse-power ratio from in-game data. The full curve is on the acceleration chart.
Engine boost threshold (reverse) ƒ
Speed below which the engine's built-in power boost applies in reverse. Matches the in-game maneuverability card's reverse threshold (Vampire II reads 10.5 here and the card shows 11; the card rounds half up).
Acceleration 0-90% ƒ
Time to reach 90% of top speed (32.9 kt of 36.5 kt), from our in-house acceleration model.
Acceleration 0-99% ƒ
Time to reach 99% of top speed (36.1 kt of 36.5 kt). 99% rather than 100% because true top speed is asymptotic (thrust meets drag), so the last fraction of a knot is never quite gained.
Traverse-to-turn ratio ƒ
How many degrees the turret can swing for each degree the hull turns. Turn rate , so . Below 5 the turrets drag in a turning fight; 25+ keeps up with any rudder.
Detectability by sea7.09 km
Detectability by air3.55 km
Smoke firing penalty2.64 km
Detect when firing (sea) ƒ
Equal to the ship's main battery range (never below base detectability): firing makes you visible to everyone you can reach. Matches the in-game 'Detect Firing Sea' value on all 8 unmodified captures, and range-modified captures track the modified range.
Detect when firing (air) ƒ
Air detectability plus the gun-firing bloom (2.54 km, which tracks main-battery caliber x 0.020). Matches the in-game 'Detect Firing Air' value on every captured ship.
Detect when on fire (sea) ƒ
Base sea detectability + 2.0 km while burning; matches the in-game 'Detect Fire Sea' value on every captured ship.
Detect when on fire (air) ƒ
Base air detectability + 3.0 km while burning; matches the in-game 'Detect Fire Air' value on every captured ship.
Guaranteed Detect2 km
 Damage Control Party∞ charges · 40 s reload · 5 s active
 Smoke Generator2 charges · 240 s reload · 28 s emit / 124 s cloud active · 450 m radius
 Engine Boost2 charges · 180 s reload · 120 s active · +8% speed bonus