World of Warships: Legends ship guide

Akatsuki

Also called: Beta
Torpedo destroyerFast, hard-hitting torpedoes; a torpedo-spam kit, not a gun trader.
Playstyle
  • Sit at the edge of a contested cap from concealment and cycle torpedo waves into lanes the enemy has to use
  • Avoid: Holding 10-km torpedoes for a perfect shot
Key characteristics
Long torps (10 km)SmokeEngine BoostLong-reach AAFlat arc HE shellsFragile
On this page
Community Data

Akatsuki Community Stats

Log in to GamingDiver and upload your data to see Community Data for Akatsuki: community win rate, damage, survival, spotting, and your own comparison.

Log in & upload to see Community Data

Playstyle

Overview

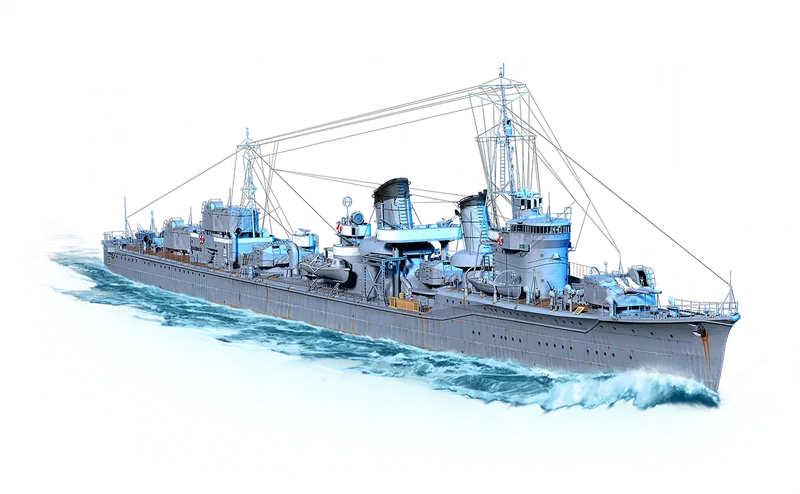
Akatsuki is a Tier VI Japanese torpedo destroyer. The kit is torpedo spam rather than gun trades: put fish into lanes the enemy has to cross and let the guns fill the gaps between reloads. Smoke plus 10 km of reach on a 76 s reload lets her launch from a position the target cannot see. Standout traits: best AA reach in T6 DDs (5 km) and top-decile flat arc HE shells in T6 DDs (915).

Positioning

Sit at the edge of a contested cap from concealment and cycle torpedo waves into lanes the enemy has to use. The 10 km reach lets you seed those lanes early, but these fish are spotted well out and give a target about 10.8 s of warning, so they earn their damage by denying space and forcing turns rather than by catching anyone unaware. Aim where a ship must go, not where it is, and stay unspotted between waves. Your guns lose penetration at range, so aim AP at broadsides you can still citadel and put HE into superstructures and upper-hull sections, rather than the bow-in or belt armor your shells bounce and shatter on. Shooting from the cloud gives you away at 2.5 km, and a destroyer here is spotted at about 6.9 km, so you see it coming with roughly 4.4 km to spare. Vision is mutual: past the 2 km guaranteed ring you cannot see out either, and nothing in her kit sees through it, so pop the smoke where someone is already lighting the enemy or you will sit in it with nothing to shoot. Enemy sonar (about 4.2 km) and radar (about 9 km) read straight in regardless.

Potato Avoidance

Holding 10-km torpedoes for a perfect shot

The kit pays out by saturating lanes, not by waiting for guaranteed broadsides; missed waves still force rotations and protect your team's flank. Idle torpedo tubes are the worst output state.

Signature Traits

Engine Boost

+8% speed (about +3 kt), 120 s duration. Engine Boost consumable lifts top speed enough to open or close a gap deliberately, though not to outrun a committed chase.

Long-reach AA

5 km AA reach, best of T6 DDs.

ELITE MAIN BATTERY
  • Flat arc HE shells · 915 m
  • Flat AP shells · 915 m
Slow reload

7.5 s reload, bottom decile of T6 DDs. Salvos punish more, but cycle is slower than peers.

Visible torps

1.8 km torpedo detect, bottom decile of T6 DDs. Spotted early, so targets get a long look and room to turn out.

Acquisition

How to get Akatsuki

Akatsuki is available in the Torpedo Destroyers branch of the Japan Tech Tree for 9,000,000 credits after researching it in the branch. Known module upgrades cost up to 2,250,000 credits.

Show Japan tech-tree branch diagram
Japan Tech Tree

Akatsuki sits in the Torpedo Destroyers branch. The highlighted path shows the local branch context inside the full Japan tree.

Builds

Pair with a commander whose unique skill complements her main armament; check the build tool for current recommendations.

Open in Build Tool →

Have a build you swear by? Open it in the Build Tool and hit Save build to share it here.

Cohort position

Hide

Where Akatsuki sits among Tier VI DDs (40 ships). Notable standouts are shown first; the rest of the cohort-ranked stats are in the expand below. Acquisition variants (Black Friday, Founders Edition) are counted once with their base ship, not as separate peers.

BestAA range5 km (1 of 12 tied) Top 10%HE velocity915 m/s (5/41) Top 10%Displacement2,080 t (3/41) Top 25%Stealth profile6.67 km / 3.34 km (6/41 / 6/41) Top 25%Rudder shift3.2 s (11/41) Top 25%Main dispersion92.9 m (6/41) Top 25%AP velocity915 m/s (5/37) Top 25%Power-to-weight24.04 hp/t (6/41) Top 25%AA threat516 (9/41) Top 25%Torpedo damage≈15,600 (11/41) Bottom 25%Fires per minute3.36 (37/41) Bottom 25%HE DPM86,400 (37/41) Bottom 10%Hit points13,100 HP (40/41) Bottom 10%Main battery range10.38 km (38/41) Bottom 10%Main battery reload7.5 s (38/41) Bottom 10%AP DPM105,600 (35/37) Bottom 10%Effective HE DPM (incl. fire)111,526 (38/41) Bottom 10%Torpedo reaction time10.8 s (39/41) WorstNo secondaries (37 of 41 in cohort) WorstDeck armor6 mm (1 of 3 tied)
See 26 mid-pack stats

Not standouts for Akatsuki -- here's where she sits on every other ranked stat in the cohort. Stats tagged NORM are tied across more than half the cohort, so the value is the cohort default rather than a standout.

Max speed38 kt(15/41) Smoke fire bloom2.49 km(17/41) Turning circle640 m(27/41) Traverse-to-turn ratio6.29 ×(15/41) Main battery caliber127 mm(21/41) HE shell damage1,800(20/41) HE fire chance7%(29/41) AP shell damage2,200(21/37) Acceleration16.9 s(14/41) AP arming threshold21 mm(20/37) Engine power50,000 hp(27/41) Turn-speed retention78.1 hp/m(31/41) AP pen at 10 km50 mm(25/35) AA DPS134(26/41) Flak per wave (expected)420(11/17) Torpedo range9.99 km(13/41) Torpedo speed62 kt(27/41) Torpedo reload76 s(12/41) NormAP fuse timer0.01 s(33 of 37 tied at this value) NormAP ricochet start45°(34 of 37 tied at this value) NormAP auto-bounce angle60°(34 of 37 tied at this value) NormTurn speed retained81%(37 of 41 tied at this value) NormMax armor16 mm(26 of 41 tied at this value) NormCitadel belt16 mm(30 of 41 tied at this value) NormBow armor16 mm(34 of 41 tied at this value) NormStern armor16 mm(34 of 41 tied at this value)
Survivability
Hit PointsInitial: 11,600 → 13,100
Displacement2,080 t
Hull dimensions
ƒLength x beam at the waterline, with the hull's draft where the client carries one. Ships whose client entry holds only the 260 x 20 m placeholder use a curated real-world figure instead, and any ship we have no trustworthy size for omits this row rather than print the placeholder. Length matters when dodging torpedoes; beam and draft shape how hard the ship is to hit.
118.4 x 10.4 m (published figure)
Armor range6–16 mm
Plate armor thicknesses6, 10, 15, 16 mm
Armor material/layer entries25
Fire resistance
ƒDoes not reduce the damage a burning fire does per second: replay-measured burn ticks run at the full rate on every ship. By elimination it lowers how often hits set you on fire; ignition-rate replay data is consistent with that but too confounded by attacker mix to measure the reduction directly.
Initial: 26.6% → 30%
Fire duration30 s
Fire damage
ƒEach fire ticks 0.3% of max HP per second for the full 30 s, so one unattended fire burns 9% of the pool (1,179 HP on this ship). 4 fire points can burn at once. Verified against measured burn ticks in replay data.
0.3% of HP per second
Flood duration40 s
Flood damage
ƒA flood ticks 0.25% of max HP per second for the 40 s duration, so one unattended flood costs 10% of the pool (1,310 HP on this ship). Verified against measured flood ticks in replay data.
0.25% of HP per second
Torp Reduction
ƒReduces torpedo hit damage. Replay data shows no effect on floods: flood ticks run at the full rate and flood frequency does not decline with protection.
0%
Magazine HP
ƒPer-turret powder-magazine HP, a separate pool from the ship's. Penetrating hits wear it down and the turret is likelier to be knocked out as it falls, so a larger pool keeps the guns firing through punishment that silences a peer's.
6,600
Steering gear HP
ƒDurability of the steering gears. As this pool drops, hits are likelier to jam the rudder; unlike most modules the steering can be knocked out and repaired but is never permanently destroyed.
3,900
Repairable: penetration50%
Repairable: steering gear50%
Main Battery
These main guns are dual-purpose: they also fire at aircraft and feed the AA Defense card.
ModuleArtillery: 127 mm/50 Type3
Mounts / barrels3 mounts / 6 barrels
Reload time7.5 s
Firing range (base)9.4 km
Firing range (top fire control)10.4 km
Turret traverse11 °/s
Turret armor20 mm
Turret traverse arcs
ƒHow far each mount can train, in degrees to either side of the mount's own facing, read from in-game data. A rear turret with ±150° leaves a 60° blind wedge over the bow; one-sided arcs are wing mounts that cover a single side. The data does not say which way each mount faces, so the arcs are listed per mount without bow/stern angles.
2x ±145°, ±150°
Guns to bear
ƒHow far off the bow (or stern) the ship must angle before every main turret can fire: the widest blind wedge among the rear-facing (or forward-facing) mounts, from each mount's trainable arc. Mount facing is inferred from turret stations and verified against known layouts, including Izumo's aft-facing forward turret.
35° off bow / 30° off stern
HE fire DPM vs T6 BB25126
Effective HE DPM vs T6 BB111526
Shell Grouping (σ)2
Max Horiz Disp
ƒHorizontal dispersion ellipse width at max range, from the verified WoWS dispersion model: σH=(R30·idealRadiusminRadiusidealDistance+minRadius)·30 =(10380.730·80.51000+0.5)·30=92.9m
92.9 m at 10.4 km
Max Vert Disp
ƒVertical dispersion ellipse height at max range: σV=σH·radiusOnMax =92.9·0.6=55.7m
55.7 m at 10.4 km
Med Horiz Disp
ƒ50%-hit horizontal radius: σH,50=σH·0.6σ =92.9·0.62=27.9m
27.9 m at 10.4 km
Med Vert Disp
ƒ50%-hit vertical radius: σV,50=σV·0.6σ =55.7·0.62=16.7m
16.7 m at 10.4 km
Turret turn time
ƒ180 degrees / 11 deg/s traverse speed = 16.4 s.
16.4 s
Shells/min
ƒ6 broadside guns x 60 / 7.5 s base reload = 48.
48
HE shells
HE Damage1,800
HE Velocity915 m/s
Fire Chance7%
HE penetration
ƒ21 mm ≈ 127 mm caliber / 6 (standard HE penetration ratio).
21 mm
HE full-salvo alpha
ƒ1,800 HE damage x 6 broadside guns = 10,800.
10,800
HE DPM
ƒ10,800 HE full-salvo alpha x 60 / 7.5 s base reload = 86,400.
86,400
Fires/min
ƒ48 shells/min x 7% fire chance = 3.36.
3.36
AP shells
AP Damage2,200
AP Velocity915 m/s
Min Ricochet45 deg
Guaranteed Ricochet60 deg
Fuse Timer0.01 s
Fuse Threshold21 mm
AP overmatch
ƒfloor(127 mm caliber / 14.3) = 8 mm (AP auto-penetrates plating this thick or less).
8 mm
AP Pen Close
ƒCanonical community AP formula (jcw780/wows_shell), evaluated at muzzle velocity: P=107·K·m0.69·d1.07·v01.38 =107·2266·230.69·0.1271.07·9151.38=219mm. Matches the in-game spec card.
219 mm point-blank
AP Pen Far
ƒSame formula at the ship's max firing range (10.4 km), where the shell has slowed to 304.2 m/s: P=107·2266·230.69·0.1271.07·304.21.38=47.9mm.
47.9 mm at 10.4 km
AP full-salvo alpha
ƒ2,200 AP damage x 6 broadside guns = 13,200.
13,200
AP DPM
ƒ13,200 AP full-salvo alpha x 60 / 7.5 s base reload = 105,600.
105,600
AP AOE Radius
ƒAP shell over-penetration splash radius; scales with shell mass. Wickes 102mm = 3, standard 152mm CL ~ 20, Iowa 406mm ~ 270, Yamato 460mm = 400, Incomparable 650mm = 550 (max). Larger value = bigger splash damage area when AP over-pens.
10
Torpedoes
ModuleTorpedoes: Type90 mod. 1
Launchers / tubes3 launchers × 3 tubes = 9 tubes
Reload time
ƒBase reload of the top torpedo module (all-upgrades configuration); the stock module reloads in 70 s. In-game port tooltips additionally fold in your installed modernizations and commander effects - e.g. Torpedo Launchers Mod. 3 alone is x0.85: 76×0.85=64.6 s.
76 s
Projectile speed
ƒSpeed of the top torpedo module (all-upgrades configuration, 62 kt); the stock torpedo module runs 59 kt. Site stats assume the full-upgrades fit unless a row shows a stock → top pair.
62 kt
Range9.99 km
Maximum simulated damage
ƒEstimate of WG's in-game value; matches the in-game port screen within ±5%. Saturation: most targets only intersect one hull section, so the sim transfers ~1/3 of the warhead alpha (2/3 when the warhead blast >= 5000 and the burst reaches a second section). For this ship: Dsim=α·c=46,800·0.333=15,600.
≈ 15,600
Maximum damage (ammunition)
ƒThe ammunition card's 'Maximum Damage' stat, exact: warhead alpha / 3 plus the blast addend. This is the per-torpedo number most references quote; the 'Maximum simulated damage' row above is WG's separate geometry-sim stat from the launcher spec panel.
16,900
Torpedo detectability1.8 km
Reaction time
ƒHow long a target has to dodge after your torpedo is spotted at its detectability range (lower means less warning): treact=1.8 km62 kt×2.6855=10.8 s. The 2.6855 m/s-per-knot game-speed factor is calibrated from in-game measurement; the community's traditional 2.6 reads about 3% slower. Base value; commander torpedo-concealment skills lower it further. Community torpedo-reaction calculator by u/LorenDovah and u/The_ColorOutofSpace.
10.8 s
Flooding chance
ƒRead straight from the game's own data: this torpedo carries a flooding-chance value of 2.87 per hit, shown as 2.87×100=287%. Torpedo flood values above 100% are normal: in battle the base chance is scaled down by the target's torpedo protection (the Torp Reduction stat on its Survivability card) and any flood-resistance modifiers, so a value above 100% keeps flooding likely even through partial protection. Not shown on the in-game port screen.
287%
Torpedo launcher traverse25 °/s
Torp Turn
ƒTime to rotate the launchers 180 deg: tturn=180°25°/s=7.2s.
7.2 s
Torp Arming197 m
Per-side salvo damage
ƒOne side firing, all torpedoes hitting: per-side tubes x per-torpedo simulated damage = 9 x 15,600 = 140,400.
140,400
AA Defense
AA mount pointsInitial: 4 → 7
Maximum AA range
ƒLongest-reaching family on the in-game AA card. Base AirDefense aura max range is 3.1 km; dual-purpose mount auras extend it.
5 km
25 mm Type96 mod. 1 (upgraded hull only)4×3 25mm
25 mm/60 Type96 mod. 1Initial: 4×1 → 2×1 25mm
25 mm Type96 mod. 1 (upgraded hull only)1×2 25mm
Far aura
Gunsmain battery (DP)
Continuous DPS
ƒEffective DPS in in-game units (raw aura damage × 3.5 × hit probability, summed per contributing aura) - matches the Close-range AA DPS headline's currency. Includes 52 from dual-purpose main battery firing as AA in this range band.
52
Range5 km
Medium aura
Guns25 mm Type96 mod. 1 + 25 mm/60 Type96 mod. 1
Continuous DPS
ƒEffective DPS: 23 raw aura damage × 3.5 × 1 hit probability = 80 - the same in-game units as the Close-range AA DPS headline.
Initial: 18 → 80
Range3.1 km
Total DPS in Aura
ƒFar 52 + Medium 80 = 132
132
Flak bursts
Bursts
ƒEach ~2 s wave fires 2 quick salvos of 1 clouds ahead of the attacking squadron - up to 2 clouds per wave × 210 damage each. Planes that fly into a cloud take its damage; clouds dissipate before the next wave lands. Defensive AA Fire, where fitted, multiplies the salvo repeats within each wave.
2 salvos × 1 clouds
Cloud damage
ƒDamage a plane takes for flying into one flak cloud, before any reductions.
210
Cloud spawn chance
ƒEvery potential cloud spawns - the full pattern, every wave. Often called flak 'hit chance', but spawned clouds always damage planes that fly into them - the roll is on spawning.
100%
Wave rate
ƒA flak wave spawns roughly every 2 s - timed frame-by-frame from gameplay footage and consistent across ships.
every ~2 s
Fired by
ƒFlak keeps firing while at least one main battery mount is operational - even losing every other AA mount does not stop it.
Main battery
Flak zone
ƒThe activation band: flak fires while attacking planes are inside it. Clouds are placed ahead of the planes' path, so bursts can land short of 2.5 km or past 5 km - once planes get inside the band, new waves stop. AA range bonuses push the outer edge out; the 2.5 km inner edge does not move.

2.5-5 km
Maneuverability
Engine power50,000 hp
Maximum speed38 kt
Turning circle radius640 m
Rudder shift time3.2 s
Engine power-boost threshold7 kt
Engine spool-up time7.7 s
Reverse spool-up time3.8 s
Reverse speed
ƒtop speed / 4 + 4.9 = 38 / 4 + 4.9 = 14.4 kt. The community reverse-speed model from the WoWs ShipBuilder project, the same source as the acceleration model on this card. Base value; speed modifiers scale it. Not shown on the in-game card.
14.4 kt
Crash stop
ƒSeconds from top speed to a dead stop after ordering full reverse: reverse power winds in over the reverse spool-up while water drag does most of the braking. Same community-model simulation as the acceleration times, using the ship's own reverse-power ratio from in-game data. The full curve is on the acceleration chart.
14.3 s
Engine boost threshold (reverse)
ƒSpeed below which the engine's built-in power boost applies in reverse. Matches the in-game maneuverability card's reverse threshold (Vampire II reads 10.5 here and the card shows 11; the card rounds half up).
10.2 kt
Acceleration 0-90%
ƒTime to reach 90% of top speed (34.2 kt of 38 kt), from our in-house acceleration model.
16.9 s
Acceleration 0-99%
ƒTime to reach 99% of top speed (37.6 kt of 38 kt). 99% rather than 100% because true top speed is asymptotic (thrust meets drag), so the last fraction of a knot is never quite gained.
28.7 s
Traverse-to-turn ratio
ƒHow many degrees the turret can swing for each degree the hull turns. Turn rate ωhull=180π·Vmax(m/s)Rturn=180π·38.0·0.5144640=1.75°/s, so ratio=ωturretωhull=111.75=6.3×. Below 5 the turrets drag in a turning fight; 25+ keeps up with any rudder.
6.3× slow
Concealment
Detectability by sea6.67 km
Detectability by air3.34 km
Smoke firing penalty2.49 km
Detect when firing (sea)
ƒEqual to the ship's main battery range (never below base detectability): firing makes you visible to everyone you can reach. Matches the in-game 'Detect Firing Sea' value on all 8 unmodified captures, and range-modified captures track the modified range.
10.38 km
Detect when firing (air)
ƒAir detectability plus the gun-firing bloom (2.54 km, which tracks main-battery caliber x 0.020). Matches the in-game 'Detect Firing Air' value on every captured ship.
5.88 km
Detect when on fire (sea)
ƒBase sea detectability + 2.0 km while burning; matches the in-game 'Detect Fire Sea' value on every captured ship.
8.67 km
Detect when on fire (air)
ƒBase air detectability + 3.0 km while burning; matches the in-game 'Detect Fire Air' value on every captured ship.
6.34 km
Guaranteed Detect2 km
Consumables
Damage Control Party∞ charges · 40 s reload · 5 s active

Smoke Generator2 charges · 240 s reload · 20 s emit / 85 s cloud active · 450 m radius
Engine Boost2 charges · 180 s reload · 120 s active · +8% speed bonus
Module options (3)

Stats above use the fully-upgraded modules. These are the research-tree alternatives; trade-offs are flagged.

HullUpgrade
  • Hit points11,600 → 13,100
  • Rudder shift5.9 → 4.2 s
  • AA mounts4 → 7
  • Close-range AA DPS5 → 23
Fire controlUpgrade
  • Main battery range9,437 → 10380.7 m
TorpedoesTrade-off
  • Reload70 → 76 s
  • Alpha damage44,900 → 46,800
  • Display damage14,967 → 15,600
  • Speed59 → 62 kt

See all derived stats

Show

All values are ship base stats with modifications and upgrade changes denoted inline.

Numbers the spec table cannot show directly: alpha-strike math, DPM, dispersion, AP penetration. Click the formula chip on any row to reveal how it is calculated.

Main battery formulas

Shell Grouping (σ)2
Max Horiz Disp92.9 m at 10.4 km
Horizontal dispersion ellipse width at max range, from the verified WoWS dispersion model: σH=(R30·idealRadiusminRadiusidealDistance+minRadius)·30 =(10380.730·80.51000+0.5)·30=92.9m
Shell scatter width @ 5 km52.5 m
Horizontal scatter at a fixed 5 km, from the same verified dispersion model as the rows below - a knife-fight-range anchor comparable across ships.
Shell scatter width @ 10 km90 m
How wide your shells scatter at 10 km, from the same dispersion model as the max-range figure above. Picking a fixed range makes this number directly comparable from ship to ship: max-range dispersion makes a longer-range gun look worse even when it's tighter at any common range. The interactive Dispersion tab on the Charts card plots the full curve from 0 to max range.
Max Vert Disp55.7 m at 10.4 km
Vertical dispersion ellipse height at max range: σV=σH·radiusOnMax =92.9·0.6=55.7m
Shell scatter height @ 10 km53.3 m
How tall the same scatter ellipse is at 10 km. Comparable from ship to ship for the same reason as the width value above. The height/width ratio is a piecewise-linear curve through three points from the ship's own dispersion data: radiusOnZero=0.2 at 0 m, radiusOnDelim=0.5 at delim·Rmax=0.5·10380.7=5190 m, and radiusOnMax=0.6 at 10380.7 m. Above the kink: k=0.5+(0.60.5)·10000519010380.75190=0.5927, so σV=σH·k=90·0.5927=53.3m.
Med Horiz Disp27.9 m at 10.4 km
50%-hit horizontal radius: σH,50=σH·0.6σ =92.9·0.62=27.9m
Med Vert Disp16.7 m at 10.4 km
50%-hit vertical radius: σV,50=σV·0.6σ =55.7·0.62=16.7m
AP Pen Close219 mm point-blank
Canonical community AP formula (jcw780/wows_shell), evaluated at muzzle velocity: P=107·K·m0.69·d1.07·v01.38 =107·2266·230.69·0.1271.07·9151.38=219mm. Matches the in-game spec card.
AP Pen Far47.9 mm at 10.4 km
Same formula at the ship's max firing range (10.4 km), where the shell has slowed to 304.2 m/s: P=107·2266·230.69·0.1271.07·304.21.38=47.9mm.
AP pen 5 km101 mm
AP penetration at a fixed 5 km, read off the same PC-validated ballistic curve as AP Pen Close/Far: the shell's impact velocity at that range fed through the canonical community AP formula P=107·K·m0.69·d1.07·v1.38. Fixed anchors make ships directly comparable at the same fighting distance; the Charts card plots the full curve.
AP pen 10 km50 mm
AP penetration at a fixed 10 km, read off the same PC-validated ballistic curve as AP Pen Close/Far: the shell's impact velocity at that range fed through the canonical community AP formula P=107·K·m0.69·d1.07·v1.38. Fixed anchors make ships directly comparable at the same fighting distance; the Charts card plots the full curve.
AP flight time @ 10 km7.25 s
How long an AP shell takes to reach a target at a fixed 10 km, from the same numerically integrated trajectory the Charts card plots. The shell slows under quadratic air drag, adrag=kρv2, where ρ is air density from a standard-atmosphere profile and k bundles the shell's drag coefficient, caliber and mass: k=πCdd28m=π·0.334·0.12728·23=9.2×10⁵. That runs from a 915 m/s muzzle velocity in 0.02 s steps under gravity 9.8 m/s² until the shell lands, then divides by 2.77: the game clock runs faster than real time, and that factor was measured against stopwatch runs in the Training Room. Lower is better, since a faster shell is harder to dodge and needs less lead.
HE flight time @ 10 km7.25 s
How long an HE shell takes to reach a target at a fixed 10 km, from the same numerically integrated trajectory the Charts card plots. The shell slows under quadratic air drag, adrag=kρv2, where ρ is air density from a standard-atmosphere profile and k bundles the shell's drag coefficient, caliber and mass: k=πCdd28m=π·0.334·0.12728·23=9.2×10⁵. That runs from a 915 m/s muzzle velocity in 0.02 s steps under gravity 9.8 m/s² until the shell lands, then divides by 2.77: the game clock runs faster than real time, and that factor was measured against stopwatch runs in the Training Room. Lower is better, since a faster shell is harder to dodge and needs less lead.
HE penetration21 mm
21 mm ≈ 127 mm caliber / 6 (standard HE penetration ratio).
AP overmatch8 mm
floor(127 mm caliber / 14.3) = 8 mm (AP auto-penetrates plating this thick or less).
AP AOE Radius10
AP shell over-penetration splash radius; scales with shell mass. Wickes 102mm = 3, standard 152mm CL ~ 20, Iowa 406mm ~ 270, Yamato 460mm = 400, Incomparable 650mm = 550 (max). Larger value = bigger splash damage area when AP over-pens.
Broadside guns used for alpha6
All 6 barrels bear on the broadside.
Turret turn time16.4 s
180 degrees / 11 deg/s traverse speed = 16.4 s.
HE full-salvo alpha10,800
1,800 HE damage x 6 broadside guns = 10,800.
AP full-salvo alpha13,200
2,200 AP damage x 6 broadside guns = 13,200.
HE DPM86,400
10,800 HE full-salvo alpha x 60 / 7.5 s base reload = 86,400.
AP DPM105,600
13,200 AP full-salvo alpha x 60 / 7.5 s base reload = 105,600.
Shells/min48
6 broadside guns x 60 / 7.5 s base reload = 48.
Fires/min3.36
48 shells/min x 7% fire chance = 3.36.

Torpedoes

Torpedo detectability1.8 km
Estimated torpedo reaction time10.8 s
detectability / (speed kt x 2.6855 game-speed factor, m/s per knot, calibrated from in-game measurement; the community's traditional 2.6 reads about 3% slower).
Torpedo speed62 kt
Travel time to max range60 s
range / (speed kt x 2.6855 game-speed factor, m/s per knot, calibrated from in-game measurement).
Torpedo module damage1,300
Per-torpedo module/blast damage parameter from in-game data. Most torpedoes carry 500 to 2,000; ships announced by WG as dealing increased module damage carry 9,000 to 12,000, so their hits knock out engines, rudders, and turrets far more often. Comparative figure; the exact module-HP conversion is not published.
Tube count9
3 launchers x 3 tubes.
Per-side salvo9 torpedoes
9 (centerline launchers train across - full salvo to either side).
Full-salvo damage140,400
All tubes hitting one target: tubes x per-torpedo simulated damage = 9 x 15,600 = 140,400.
Per-side salvo damage140,400
One side firing, all torpedoes hitting: per-side tubes x per-torpedo simulated damage = 9 x 15,600 = 140,400.

AA defense

AA DPS at max range53
Only families that reach 5 km contribute at the outer edge of the AA bubble. In-game families: 25mm Type96 4x3 -> 46 DPS @ 3.1 km; 25mm Type96 single 2x1 -> 23 DPS @ 3.1 km; 25mm Type96 double 1x2 -> 12 DPS @ 3.1 km; Far AA (?) -> 53 DPS @ 5 km.
Maximum AA range5 km
Longest-reaching family on the in-game AA card. Base AirDefense aura max range is 3.1 km; dual-purpose mount auras extend it.
AA DPS layered by range53 DPS @ 5 km, 134 DPS @ 3.1 km
Cumulative AA DPS at each family range threshold. Inner ranges stack the outer families, so a target closing the distance hits stronger AA bubbles as it crosses each band.
AA DPS at point-blank134
Sum of every family's average DPS, achievable only inside the closest-range family (3.1 km).
AA threat index516
SUM over AA auras of (aura DPS x aura range km). A plane crossing the AA bubble is exposed to each aura for a time proportional to that aura's range, so long-reach DPS is worth more than the same DPS in a short bubble. Units: DPS*km; used to rank overall AA threat across the cohort.

Armor Beta

Hull HP 11,60013,100 with hull upgrade, distributed across 5 hull zones, each with its own plate thicknesses, saturation cap, and pen thresholds. HP caps are the exact in-game values, not estimated.

Bow & stern16 mm

Overmatched by 125+ AP guns across the bracket. Can’t reliably bow-tank; gets bow-citadelled and overpenned.

Farming6 mm

Superstructure and extremities take HE pens and AP overpens from nearly any gun: steady chip damage. Fire resistance 30%, fires burn 30s. Range-by-range in the Compare tool →

Section Plates HP cap Threats Tactic
Bow16 mm primary (range 15–16 mm)1,800 (14% of HP)
Overmatched by 283mm+ AP (Graf Spee, Scharnhorst)Angle bounces 203mm16 mm: HE pens from 127mm+
Bow-tank fits behind this exterior plate. Saturation is FAST here; the cap is often only a few thousand HP.
Hull (midship)15 mm9,800 (75% of HP)
Overmatched by 283mm+ AP (Graf Spee, Scharnhorst)Angle bounces 203mm15 mm: HE pens from 127mm+
Largest HP pool. Citadel sits behind these plates; thinner deck and side plating absorb the rest.
Stern16 mm primary (range 15–16 mm)1,300 (10% of HP)
Overmatched by 283mm+ AP (Graf Spee, Scharnhorst)Angle bounces 203mm16 mm: HE pens from 127mm+
Mirror of bow. Same fast saturation.
Citadel16 mm primary (range 6–16 mm)≈ 165,500 (effectively no cap)
Citadel pen: full damageOver-pen: ×0.10 damage
Effectively no cap; citadel pool sits at ~165k HP on every ship. An AP citadel penetration deals the shell's full damage, the biggest single hit available; only over-penetrations are damped, to ×0.10.
Superstructure6 mm800 (6% of HP)
Any HE ≥16 mm pens at full damage
Any HE ≥16 mm pens at full damage. HE-spam target, and the section saturates fast (often only a few thousand HP).
Turret (module, per magazine)separate HP pool, does not drain ship HP6,600 magazine HPTurret knocked outPer-turret powder-magazine HP, a separate pool that does not drain ship HP. As it is worn down the turret is likelier to be knocked out, and a smaller pool gets there faster.
AA mount (25 mm mount)separate HP pool, does not drain ship HP200 per-mount HPDestroyed at 0 HPPer-mount HP for the heaviest AA on this ship. An AA mount destroyed at 0 HP stops shooting down planes for the rest of the battle; DCP does not repair destroyed mounts. HE shells specifically target AA mounts since the small-caliber HP pool falls fast.
Rudder (module)separate HP pool, does not drain ship HP3,900 module HPIncapacitated at 0 HPWhen module HP reaches 0 the rudder locks at its current angle until DCP repairs it. Repair via Damage Control Party.

Saturation cap = HP a section can absorb before further damage to it is reduced (the "bow-tank" effect). Citadel pool is ~165k on every ship (effectively no cap); damage is gated by pen/over-pen multipliers instead. Superstructure saturates fast but HE always pens regardless of the plate thickness. Rudder (and other module HPs) are a separate pool from ship HP: damaging a module doesn't drain ship HP. Incapacitated modules like the rudder and engine are restored by DCP, but secondary and AA mounts destroyed at 0 HP stay out for the rest of the battle.

Open in Charting Tool

Ship Charts

Exteriors

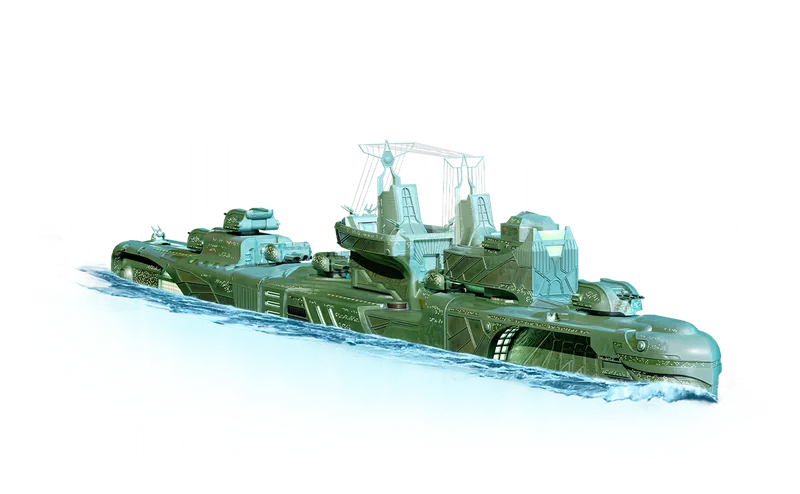
Skins & permanent camouflages

Every custom exterior Akatsuki can equip, from in-game data.

Primary official WG sources

Filtered to official World of Warships: Legends pages where this ship is a focus, reward, line member, or high-context variant mention.